Windows PowerShell is a tool created by
Microsoft. It is used for simplifying the execution of repetitive tasks
or taking care of configuration tasks. PowerShell is made up of a
console interface that resembles that of the command line tool known as cmd (which most IT savvy users know how to access by executing command from the Run dialog box).
The
difference between PowerShell and cmd is that PowerShell has the
capability to run scripts. In addition, due to the special privileges
provided for this tool, you can access other software running in the
computer and even access resources over a network. These capabilities
can also allow you to communicate with Linux or devices that are
connected to your computer’s network. To fulfill its functionalities,
PowerShell uses commandlets (written as: cmdlets), which combine several
scripts of commonly used routines. Execution of these combined routines
can then greatly simplify your own scripts. In this article we will
explore different ways of using PowerShell, to achieve greater command
of the computer’s resources.
Start PowerShell
Before delving into the various ways that you can use PowerShell, we will first see how you can launch PowerShell.
To Start PowerShell with normal privileges:
• Click the Start button
• Type PowerShell in the run dialog box and hit enter
This will launch the PowerShell window as shown below.
As
a normal user, however, you will not be able to perform many of the
administrative tasks which we aim to accomplish. Therefore, let’s launch
PowerShell with full administrative rights.
- Click the Start button
- Click Programs then Accessories then PowerShell folder
- Then Right-click Windows PowerShell and choose: Run As Administrator from the menu.
You
can also run powershell from command line (cmd). This method of
starting PowerShell will enable you to specify arguments like /noexit,
-nologo. Whereby, the former instructs Windows to allow PowerShell to
remain open after finishing running a script and the latter to allow
PowerShell to run without the banner at the top.
Customize PowerShell
Now
that you have opened a PowerShell interface, you might need to get
comfortable with the way it looks before you start scripting. In this
section, we will customize the PowerShell User Interface (UI) to our
liking.
You can adjust the PowerShell properties by using scripting.
That is, you will need to enter commands into the PowerShell’s command
line to tweak some of the UI properties.
Here is an example:
• >(Get-Host).UI.RawUI
• >(Get-Host).UI.RawUI.BackgroundColor = “Red”
• >(Get-Host).UI.RawUI.ForegroundColor = “White”
• >cls
The
line (Get-Host).UI.RawUI instructs PowerShell to run the cmdlet
Get-Host which will give us the ability to interact with the RawUI
property under UI.
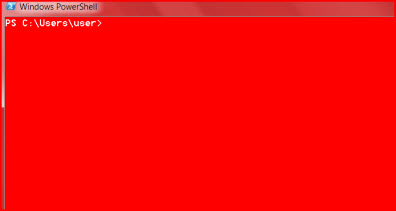
The second line sets the back ground color of the console to red while the third line sets the foreground color to white.
The last command, cls, will clear the screen to enable us see the new settings that we had specified.
Here is the end result:
Scripting
Execution Policy
Before you start scripting, you should note that Windows does not allow
scripts to run by default. Look at how your system’s policy towards
scripts is currently set. To do this first, you can run the command:
>Get-ExecutionPolicy.
You will get an output that may be either Restricted, RemoteSigned, AllSigned or UnRestricted. Where the terms mean:
• Restricted – no scripts will run.
• RemoteSigned – run scripts from the internet that have been signed by a trusted provider.
• AllSigned – run a script only if it has been signed (including those that are local).
• UnRestricted – run all scripts.
For normal purposes, we will set the policy to RemoteSigned. By typing the following command: Set-ExecutionPolicy RemoteSigned.
File Paths
Powershell
scripts are stored as .PSI files in your root directory. However, you
should make sure that PowerShell will know where that .PSI file is
located. It is not enough to run a script file just by specifying its
name then expect it to perform the desired tasks. PowerShell requires
you to explicitly specify the path of the script file.
For
example, the Scripts folder under C: drive usually contains a script
file named Test.PS1. To run it you should enter the command as:
C:\Scripts\Test.PS1.
A script file will also not run if its path
name contains spaces. Consider the command: C:\Scripts\Just A Test.PS1.
The Just A Test.PS1 file will not be recognized by PowerShell and you
will get an error reply. To remedy this, make sure that filenames that
contain spaces have their path enclosed in quotes to enable them get
recognized by PowerShell, that is: & “C:\Scripts\Just A Test.PS1”.
Where the ampersand tells PowerShell that the value enclosed in braces
is a command file and not just any string.
Dot Sourcing
Consider a script file, Values.PS1, that contains the following:
$X = 25
$Y = 20
This file has declared three variables, X and Y which are place holders
(also known as variables) for anything that we assign to them. And a
second file, Answer.PS1, that contains:
$Z = $X + $Y
Where Z
is a variable which contains the sum of the values of X and Y. To enable
Answer.PS1 to run without producing an error, we will need to make it
recognize the values from Values.PS1 file, as if they all resided in one
script file. We shall do so by a term called ‘dot sourcing’ the script
from the Values.PS1 file:
. C\Values.PS1
This command tells
PowerShell that the variables from Values.PS1 should be made available
to any other file that may need it from within PowerShell. Therefore by
executing $Z, from the command line, we will get an output of 45. Simple
as that!
To conclude, you should
know that what has been discussed here is only the tip of the iceberg.
Lot more we can do with PowerShell. You can use PowerShell to automate
your computing tasks, by which you will experience a level of control
only achievable by harnessing the true capabilities of your computer’s
system resources.